 |
| Assumptions: -----Bonus points if your shaper is equipped with a feeder |
| Terminology: |
| LET'S GET
STARTED Knowing the overall finished size of the door is the first part of the equation. Secondly, you must decide on the width of material you would like to use for the rails and stiles that make up the frame. There is no hard and fast rule for this, just personal preference. I normally choose to use material ripped to 2.38" wide as it simplifies the math for my tooling which produces a dado (the centered groove where the panel will sit) that is .38" deep. That will be the width of the material used in this tutorial. Your tooling may be different but the only characteristic that is important to know is the depth of the dado created by your tool. This dimension will be referred to as the offset. If your offset is not .38" just switch the number in the formula to match your offset. For those of you fortunate enough to have the luxury of multiple routers, you may elect to leave your rail and stile tools permanently mounted like I do.  These tools take quite a bit of fussing to get them dialed in for the perfect joint and believe me, you don't want anything less. Follow any instructions that came with your router and your tooling and pay particular attention to the way the joint fits up on the outside face. Properly set tooling should produce joint lines that require a minimal amount of sanding on the face. Any variation in material thickness will show up on the inside of the door where it is not too big of a problem to sand flush and still produce a good looking door. |
| THE
MATH Let's make a door and let's decide that it needs to be 12"W x 18"H. Overall door height is the same dimension as the length of the stiles, couldn't be easier right? OK, so jot that set of numbers down on your cutlist as 2pcs @ 2.38" x 18". Next, we will calculate the rail length as follows. Door width (12") minus 2 x the stile width (2.38") plus 2 x the offset (.38"). Hopefully you arrived at 8". Add this set of numbers to your cutlist as 2 pcs @ 2.38" x 8". Now we are sailing. On to the panel size. The width of the panel will be the same as the length of the rails, minus an eigth of an inch (my normal allowance) to allow for seasonal movement of the wood. The length of the panel will be computed as the overall door height (18") minus 2 x the rail width (2.38") plus 2 x the offset (.38"). This ciphers out to 14" right? So add this to your cutlist as 1 pc @ 7.88" x 14". If you do not have a board wide enough then the first actual hands on work will be to glue up for the panel. Nothing more than square edges where your boards are meeting, some Titebond II and a couple of clamps are required for this. Glue it, clamp it, clean up the squeeze out and set it aside to cure. Then get the rest of the material on your cutlist cut to size. If this is your first dance with rail and stile tooling, an extra piece or two wouldn't be out of line. |
| MACHINING THE RAILS &
STILES The first cut will be the cope cut on the ends of the rails. Set your tool height as instructed by the tool manufacturer and then set your router table fence so that it is in line with the bearing on the tool .  Next, take a piece of scrap/extra material 6" to 8" square and make a practice cut. 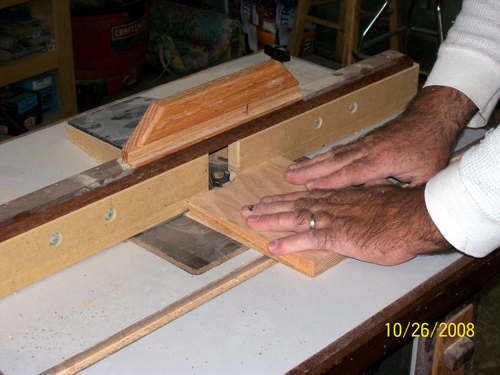 This sample cut now becomes your backer and your push tool... 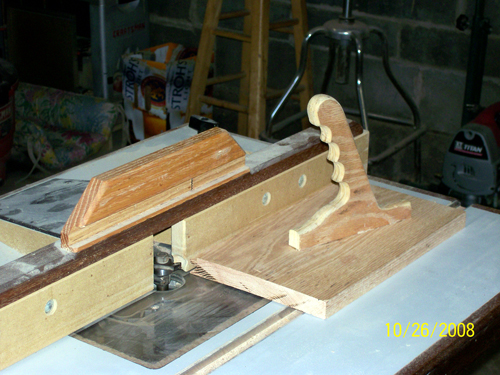 ...assuming that you are happy with the geometry of the cut. Ideally, (in my opinion) you want the 2 sections that I have blackened, to be about the same thickness.  Stack your rails so that the more desirable grain pattern is facing down which will put it on the outside of the door. Use the block to square up the rails to the fence and push them through the cutter on each end.  This part is now done. The second cut will be the rip. Set your tool height as instructed by the tool manufacturer and then temporarily, set your router table fence in line with the bearing on the tool. Take a practice cut on a piece of scrap/extra material and mate it up to the cut on the ends of the rails. You will need to adjust the height of your tool until the joint is flush on the face. 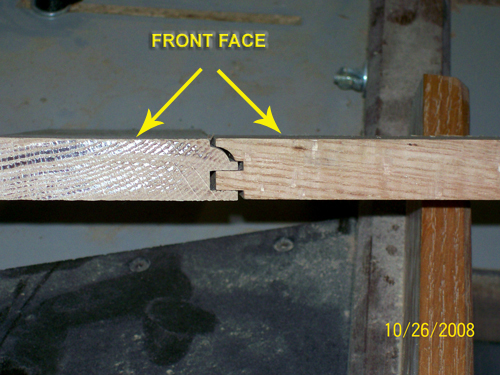 Once you have dialed in the height, you may need to adjust your fence forward so that you are not taking the whole cut in one pass. 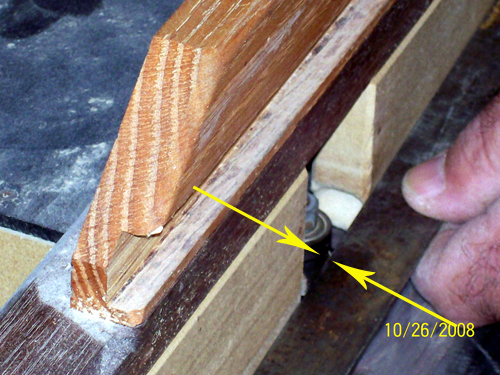 Some woods, oak for instance, or highly figured woods (multi-directional grain patterns) are subject to tearing rather than cutting if you take too deep of a cut. I would suggest you set the fence somewhere around a quarter of an inch in front of the bearing on your tool for your first pass. Orient all your stock with the more desirable grain pattern facing down and the less desirable edge of that face towards the cutter. Run all the rails and stiles through this setup and then adjust the fence until it is in line with the bearing on the cutter for the finish pass. Once the machining is done, it would be advisable to sand the inner surfaces of the rails and stiles while they are easy to access. Lightly round over the edges of the dado. If there is any tear out or chipping present, you can round the edge over sufficiently to conceal this without detracting from the look of the door assembly. |
| MACHINING THE RAISED
PANEL Get the stock for your panel cut to the proper finished size carefully making sure that all the corners are at 90 degrees. Mount your tool in the router or shaper as directed by the tooling manufacturer. Here, I must confess that I have raised a few panels with a router setup but I wasn't completely at ease during the process. I find this a much easier, and I think, safer, process performed on a shaper. Thus endith the sermon. The adjustment you will want to concentrate on here is getting the height set so that the face of the raised panel is flush with the face of the door frame. Once this is dialed in, adjust your fence so that the material is removed in 3 to 4 steps (fence settings). 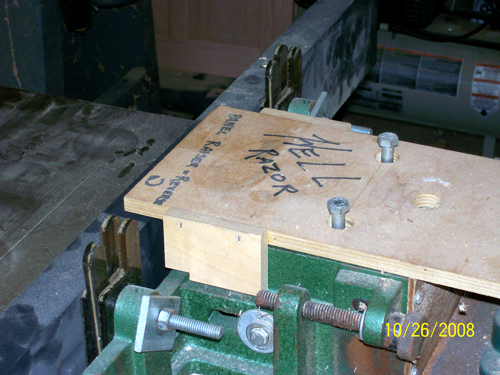 Run all 4 sides through the tool before moving on to the next fence position. My advice on raising panels is to cut in this order. Run both cross grain cuts through the tool first as a preliminary cut.  There may be some tear out at the end of the cut but not to worry, this will disappear when you cut the adjoining side. Using a flat rasp held flush with the face of the panel, remove any burr on the cut that raises the panel up off the table.  It doesn't take much of a burr to create a problem. Especially if your tool has a back cutter (more on this later). 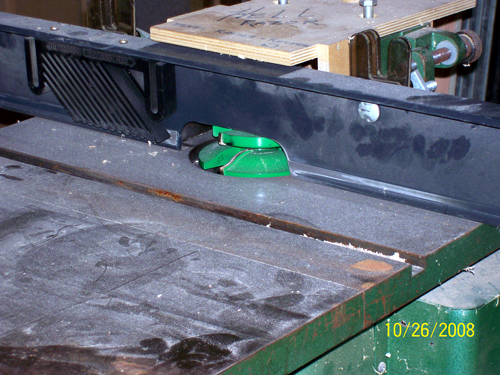 Then, recut one cross grain edge, rotate the blank 90 degrees and cut with the grain. 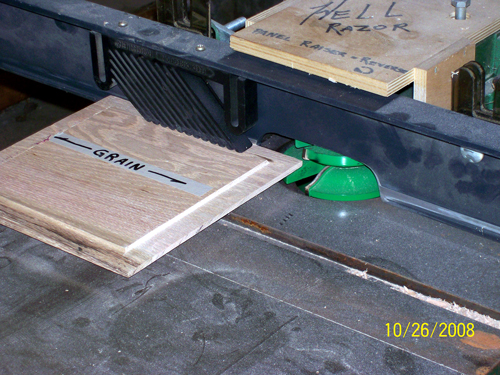 Cut the second cross grain edge and then the final edge in line with the grain. I am of the opinion that a center panel should be the same general thickness as the rails and stiles. There are just as many people that think otherwise. To raise a panel in line with my way of thinking, you may wish to equip your panel raiser with a back cutter. That way, the tongue that inserts into the dado is sized while you are raising the panel without additional setups and secondary operations. Once you have successfully sent your raised panels through all the passes necessary to get to the final shape, it is a good time to sand the machined surfaces until they are ready for the finish. |
| ASSEMBLING YOUR
DOOR After a dry fit to make sure everything fits, it is time for the glue and clamps. Lay a stile on your assembly table with the face towards you and the dado looking up. Place the 2 rails in your hand, back to back and apply glue, spread it into all the joint features with a bush and then flip them end for end and repeat. Now, attach 1 rail to the stile on the bench making the ends flush and the assembly should be eyeballed to 90 degrees. Install the raised panel and then the second rail holding it flush with the end of the stile. Finally, attach the second stile flush on both ends with the rails and give each end a rap with a dead blow mallet. Now you will need to clamp up the assembly until the glue cures and clean up any squeeze out at the joints. I advise that the clamps span the door over the centerline of top and the bottom edges so that the force they apply holds the door straight. 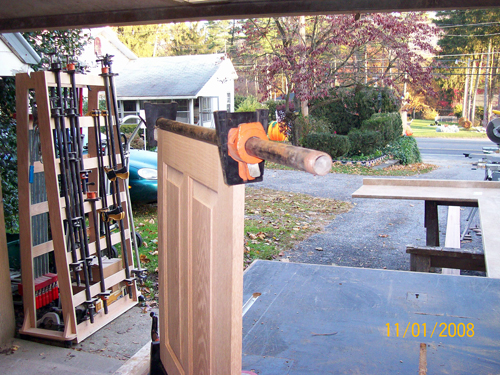 I have seen some instances where clamping across the front or back of the door will apply unequal force and create an out of plane (crowned, bowed, doesn't lay flat) door assembly. Another thing to consider when clamping is to apply masking tape to your clamp bar where it crosses over the glued joint. It will keep your clamp clean and prevent any discoloration of the wood due to chemical reactions between the acids in the wood and the moisture in the glue. After the glue is cured, I will normally run the top and bottom edges of the door through the saw, removing a thirty second or so on each edge to expose a tight joint line. 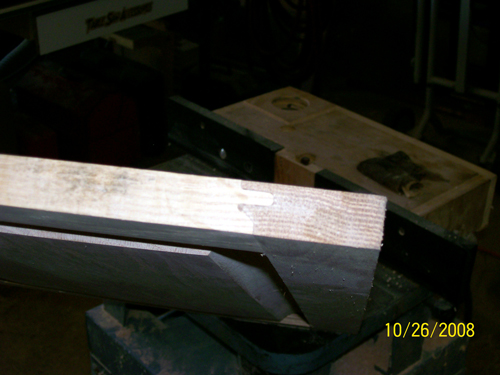 |
| FINAL MACHINING ON YOUR
DOOR Now is the time to bore for your hinges... 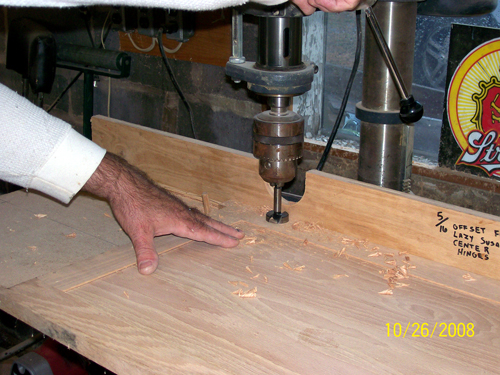 ...if you are using the concealed European style, drill for your handle and cut any edge detail on the door perimeter. 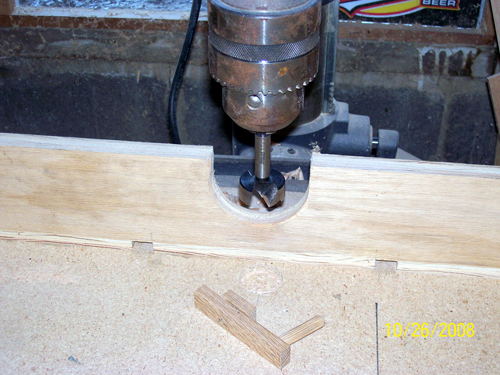 Let me add here, that a small ogee detail on the door edge... 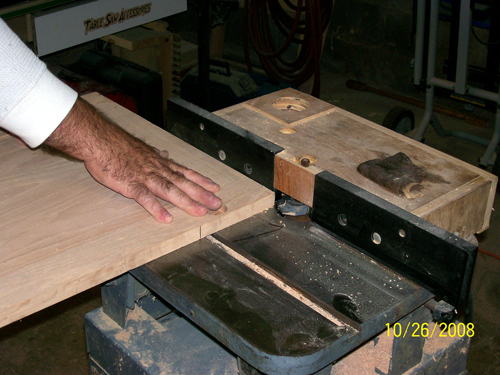 ...will reduce the weighty appearance of your door and add a touch of elegance, further enhancing the complex appearance of your joinery. 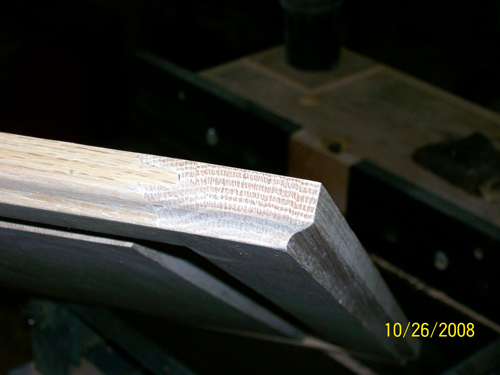 Now your door is ready for final sanding and your favorite finish and seal coat. If you are staining your door, use a blow gun on an air hose to force stain into the dado from front and back. That way, when the center panel shrinks in the heating season, raw wood will not be visible. Now to close, here is an unsolicited, unpaid product endorsement. Rockler (www.rockler.com) offers an item (37603) they call the "Sure Hook". It fits perfectly into the 35mm counterbore for the European style hinges. 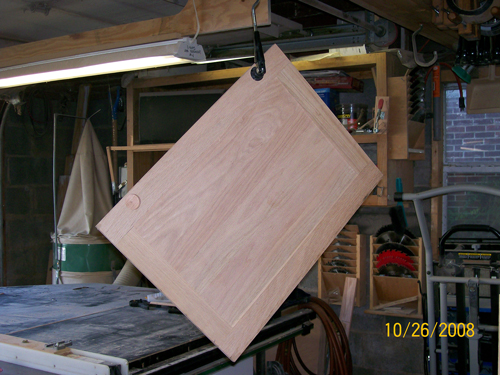 It gives you a great way to hang your door to spray the seal coat on all surfaces at once. I love them, but only to the point where I use 1 per door. I am still a bit of a tightwad after all and 2 per door seems way too civilized. 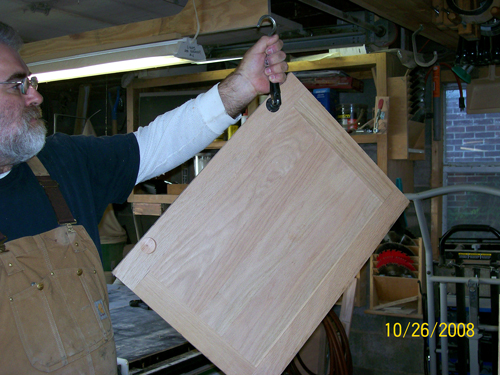 |